
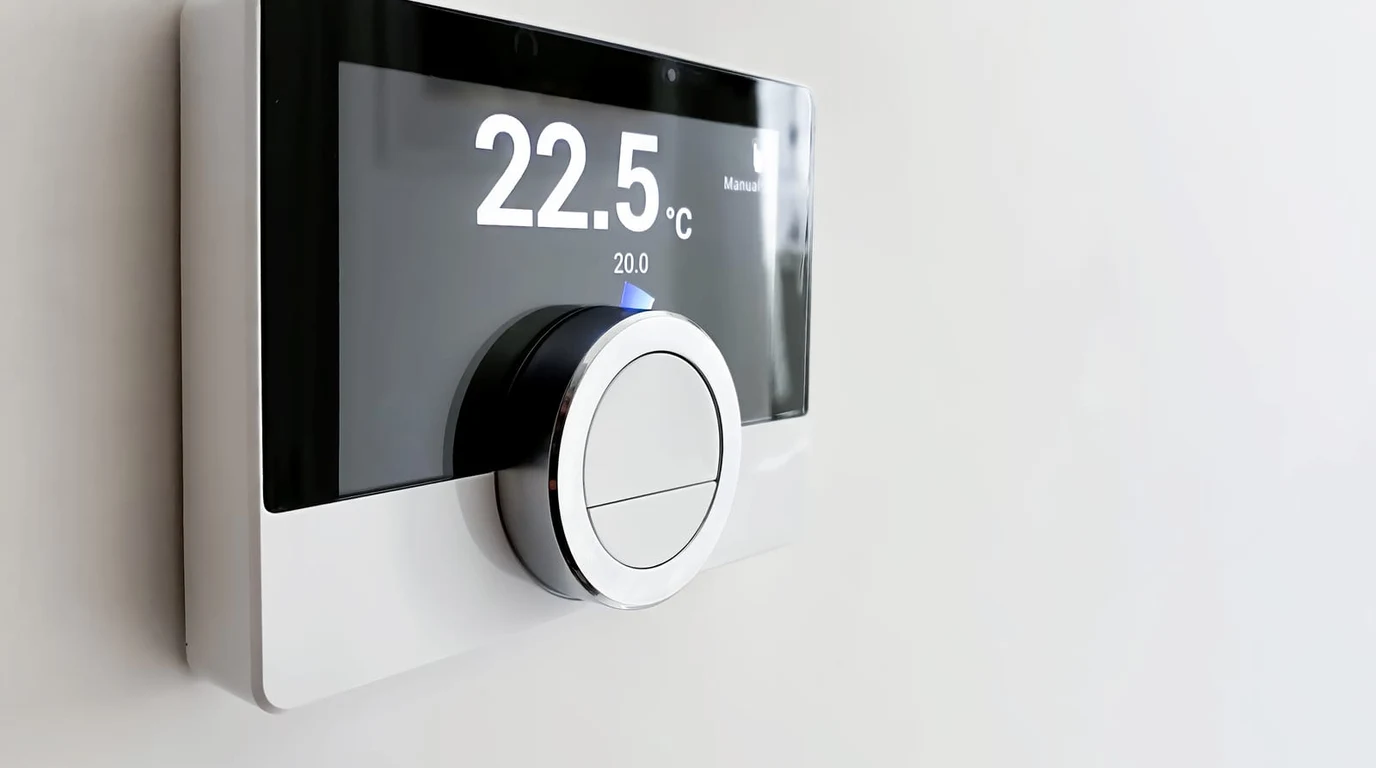
The chill bites a little harder, doesn’t it? You invested in a heat pump, perhaps even a dual-fuel system, with the promise of lower energy bills and a greener footprint. You installed a smart thermostat, thinking you’d unlocked peak efficiency. Then the first real cold snap hits, and that electric bill lands like a lead weight. Suddenly, your “efficient” heat pump seems to be guzzling electricity, often with that dreaded “Auxiliary Heat On” message glowing on your thermostat. It’s frustrating, confusing, and frankly, expensive. You feel like you’ve been sold a dream that’s turned into a financial nightmare, and you’re left wondering if you made the right choice.
You’re not alone. This isn’t a flaw in your heat pump; it’s almost always a misconfiguration in your smart thermostat, a silent saboteur lurking in the default settings. The good news? This isn’t some unsolvable mystery. It’s a precise engineering challenge, and we’re going to tackle it together, turning that frustration into tangible savings.
The critical takeaway here is that your smart thermostat, left to its own devices, will likely default to a setting that prioritizes comfort (by ensuring some heat is always available) over efficiency and cost savings. It’s up to you, the informed homeowner, to intervene and optimize these settings.
Direct Practical Verdict:
The primary culprit for excessive heat pump auxiliary heat is a factory-default thermostat setting that activates costly electric resistance strips too early. Modern heat pumps operate efficiently down to much lower temperatures than these defaults suggest. Manually adjusting your smart thermostat’s compressor lockout temperature, often to 10°F (-12°C) or even 0°F (-18°C) for cold-climate units, is crucial for maximizing efficiency and minimizing energy bills in dual-fuel systems.
Why Does My Heat Pump’s Auxiliary Heat Turn On So Early?
Let’s pull back the curtain on what’s really happening. Most smart thermostats, whether it’s an Ecobee, Nest, or Honeywell Home, come with a default setting that tells your heat pump to stop running its compressor and switch to auxiliary heat (usually electric resistance strips or a fossil fuel furnace in a dual-fuel setup) when the outdoor temperature drops to around 35°F (2°C). Now, why would they do that? Historically, older heat pump technology struggled to extract heat from the air efficiently below this temperature. The Coefficient of Performance (COP) would drop significantly, making the electric resistance strips a more “sensible” (though still expensive) option. It was a safety net, a way to ensure your home stayed warm even if it meant a higher bill. But here’s the critical point: your modern heat pump is not your grandmother’s heat pump. Today’s cold-climate heat pumps, especially those with variable-speed compressors and enhanced vapor injection (EVI) technology, are engineered to deliver substantial heat output and maintain a respectable COP well below freezing, often down to 0°F (-18°C) or even -15°F (-26°C). When your smart thermostat, with its outdated default, forces your advanced heat pump to shut down at 35°F, it’s like buying a Ferrari and only driving it in first gear. You’re paying for cutting-edge technology, but a simple software setting is preventing you from realizing its full potential. The result? Your expensive, efficient heat pump sits idle while your electric resistance strips, which operate at a COP of 1.0 (meaning every unit of electricity generates only one unit of heat), kick in, often tripling your heating costs compared to what the heat pump could have delivered. This isn’t just inefficient; it’s a direct hit to your wallet.Unpacking the Dual-Fuel Dilemma: Thermal vs. Economic Balance Points
To truly master your dual-fuel system, we need to understand two fundamental concepts: the Thermal Balance Point and the Economic Balance Point. These aren’t just academic terms; they are the keys to unlocking your system’s true efficiency. The Thermal Balance Point (TBP): The Heat Pump’s Physical Limit Imagine your house is a leaky bucket, constantly losing heat to the cold outside. Your heat pump is like a pump trying to fill that bucket. The Thermal Balance Point is the outdoor temperature at which your heat pump’s maximum heating capacity exactly matches your home’s heat loss. Above this temperature, your heat pump can comfortably keep your home warm on its own. Below this temperature, your heat pump, even running at full tilt, cannot quite keep up with the heat loss. It’s still producing heat, and often doing so more efficiently than electric resistance, but it needs assistance to maintain your desired indoor temperature. For modern cold-climate heat pumps, this TBP can be surprisingly low, often in the range of 10°F (-12°C) to 20°F (-7°C), sometimes even lower for specialized units. The Economic Balance Point (EBP): The Cost-Efficiency Crossover Now, here’s where things get interesting for dual-fuel systems. The Economic Balance Point is the outdoor temperature at which the cost per delivered BTU from your heat pump becomes equal to the cost per delivered BTU from your auxiliary heat source (your gas furnace or electric resistance strips). Think of it this way: as the outdoor temperature drops, your heat pump’s efficiency (its COP) decreases. At some point, even though it’s still working, the cost of the electricity it consumes to produce heat might become higher than the cost of burning natural gas or propane in your furnace to produce the same amount of heat. This is your EBP. For dual-fuel systems, the EBP is almost always higher than the TBP. This means there’s a temperature range where your heat pump can physically heat your home, but it might be cheaper to use your fossil fuel furnace. The exact EBP depends heavily on your local electricity rates, natural gas prices, and the specific efficiency curves (COP) of your heat pump at various temperatures.The Hidden Cost of Factory Defaults: What 80% Get Wrong
The biggest mistake, the “costly trap” that ensnares most homeowners, is simply trusting the thermostat’s factory default settings. As we discussed, these defaults are often conservative, designed for older technology, or set to a “safe” temperature like 35°F (2°C) to prevent comfort complaints, regardless of cost. What 80% of practitioners or consumers get wrong is failing to understand that: 1. Modern heat pumps have significantly lower thermal balance points. They can deliver heat efficiently at temperatures where older units would have struggled. 2. The default auxiliary lockout temperature is almost never optimized for a modern cold-climate heat pump or for your specific fuel costs. It’s a generic setting that costs you money. 3. Ignoring the economic balance point in a dual-fuel system means you’re leaving money on the table. You might be running your heat pump when your gas furnace would be cheaper, or vice-versa. Let’s break down the implications with a comparison:| Characteristic | Factory Default Lockout (e.g., 35°F / 2°C) | Thermal Balance Point (TBP) | Economic Balance Point (EBP) for Dual Fuel |
|---|---|---|---|
| Definition | Pre-set outdoor temperature where the heat pump compressor is disabled, and auxiliary heat takes over. | Outdoor temperature where heat pump capacity exactly matches home heat loss. Below this, supplemental heat is needed for comfort. | Outdoor temperature where the cost per delivered BTU from the heat pump equals the cost per delivered BTU from the auxiliary fuel source. |
| Typical Value (Modern HP) | 35°F (2°C) to 40°F (4°C) | 10°F (-12°C) to 20°F (-7°C), sometimes lower for cold-climate units. | Highly variable, often 25°F (-4°C) to 40°F (4°C), depending on fuel costs and HP efficiency. |
| Trigger Mechanism | Hard-coded thermostat setting. | Heat pump’s physical performance curve vs. building heat loss. | Calculated crossover point based on real-time fuel costs and heat pump COP. |
| Impact on Energy Bill | Significantly increases electricity consumption and cost due to premature auxiliary heat use. | Ensures comfort by bringing in auxiliary heat only when physically necessary, optimizing heat pump runtime. | Minimizes overall heating cost by switching to the cheapest fuel source at any given temperature. |
| Recommended Action | Adjust this setting downwards to align with your heat pump’s actual thermal capabilities. | Determine this value from your heat pump’s specifications or an HVAC professional. | Calculate this value based on current fuel costs and heat pump COP, then set your thermostat’s “dual fuel balance point” accordingly. |
Your Step-by-Step Playbook for Optimizing Dual-Fuel Performance
Alright, let’s get practical. This isn’t rocket science, but it does require a bit of homework and careful adjustment. We’re going to walk through the process of taking control of your dual-fuel system’s balance point. Step 1: Understand Your Heat Pump’s True Capabilities Before you touch any thermostat settings, you need to know what your specific heat pump is designed to do. * Consult your heat pump’s owner’s manual or specification sheet. Look for data on “minimum operating temperature,” “heating capacity at various outdoor temperatures,” and “Coefficient of Performance (COP) at various outdoor temperatures.” * Identify if it’s a “cold-climate” or “low-ambient” heat pump. These units are specifically designed to perform well down to 0°F (-18°C) or even -15°F (-26°C). If your unit is older or not explicitly rated for cold climates, its TBP might be higher. * Typical Range: For modern cold-climate heat pumps, you’ll often find they can maintain a COP above 2.0 (meaning they deliver twice the heat energy for the electricity consumed) down to 10°F (-12°C) or even 0°F (-18°C). This is the thermal limit we’re interested in for the compressor lockout. Step 2: Gather Your Fuel Cost Data This is crucial for determining your Economic Balance Point. * Electricity Cost: Find your average cost per kilowatt-hour (kWh) from your electric bill. Include all charges: generation, transmission, distribution, and any fixed fees divided by your total kWh usage. Be aware of time-of-use (TOU) rates if applicable. * Natural Gas Cost: Find your cost per therm (or CCF, which you’ll need to convert to therms: 1 CCF ≈ 1.03 therms) from your gas bill. Again, include all charges. * Propane/Oil Cost: If you use propane or oil, note your cost per gallon. * Furnace Efficiency: Know your auxiliary furnace’s Annual Fuel Utilization Efficiency (AFUE). Most modern gas furnaces are 80% to 98% efficient. Step 3: Calculate (or Estimate) Your Economic Balance Point (EBP) This is where you compare the cost of heat from your heat pump versus your auxiliary fuel. While a precise calculation involves complex formulas and your heat pump’s specific COP curve, we can simplify for practical purposes. * Heat Pump Cost: (Electricity Cost per kWh) / (Heat Pump COP at a given outdoor temperature) * Furnace Cost: (Fuel Cost per Unit) / (Furnace Efficiency) You’re looking for the outdoor temperature where these two costs are roughly equal. Many online calculators or HVAC professionals can help with a more precise EBP calculation. As a general rule of thumb: * If natural gas is very cheap and electricity is expensive, your EBP will be higher (meaning you switch to gas sooner). * If electricity is relatively cheap (especially with a high-efficiency heat pump) and gas is expensive, your EBP will be lower (meaning you run the heat pump longer). * For many dual-fuel homes with modern heat pumps and average fuel costs, the EBP often falls between 25°F (-4°C) and 40°F (4°C). Step 4: Adjust Your Smart Thermostat’s Compressor Lockout Temperature This is the core adjustment. We’re going to override the conservative factory default. The goal is to set the compressor lockout to your heat pump’s thermal balance point (or slightly above if you prefer a safety margin), and then, if your thermostat supports it, set a separate dual-fuel balance point for your fossil fuel furnace based on your EBP. General Navigation Tips (UI paths vary slightly by model): * Access Installer/Advanced Settings: You’ll typically need to go into the thermostat’s main menu, look for “Settings,” then “Installation Settings,” “Technician Settings,” “Equipment Settings,” or “Advanced Settings.” Sometimes, a specific button combination or a long press is required to unlock these menus. * Look for “Heat Pump,” “Auxiliary Heat,” or “Dual Fuel” Settings: Within the advanced settings, navigate to the section related to your heat pump and auxiliary heat. Specific Guidance for Popular Smart Thermostats: * Ecobee (e.g., Ecobee3 Lite, Ecobee SmartThermostat): 1. On the thermostat, tap the Menu icon (bottom left). 2. Go to “Settings” > “Installation Settings” > “Thresholds.” 3. Look for “Compressor Min Outdoor Temp” or “Aux Heat Max Outdoor Temp.” This is your compressor lockout. 4. Set “Compressor Min Outdoor Temp” to your heat pump’s thermal limit. For modern cold-climate units, this could be 10°F (-12°C) or even 0°F (-18°C). *Do not set it below your heat pump’s rated minimum operating temperature.* 5. If you have a dual-fuel system with a gas furnace, also look for “Aux Heat Outdoor Temp” or “Furnace Balance Point.” This is where you’d set your Economic Balance Point. For example, if your EBP is 30°F (-1°C), set this to 30°F. This tells the thermostat to switch to the furnace at 30°F, but the heat pump can still run down to your compressor lockout temp (e.g., 10°F) if the furnace isn’t needed or if you override it. 6. Ensure “Aux Heat Max Outdoor Temp” is set to a reasonable value (e.g., 60-70°F) to prevent aux heat from running unnecessarily on mild days. * Nest (e.g., Nest Learning Thermostat, Nest Thermostat E): 1. On the thermostat, go to “Settings” (gear icon). 2. Select “Equipment” > “Heat Pump” > “Dual Fuel.” 3. Look for “Heat Pump Balance” or “Auxiliary Heat Lockout.” 4. Set “Heat Pump Balance” to your desired compressor lockout temperature (your TBP). Nest typically uses a slider or specific temperature increments. Again, aim for 10°F (-12°C) or 0°F (-18°C) for cold-climate units. 5. Nest’s “Heat Pump Balance” often serves as both the thermal and economic balance point in dual-fuel setups, switching to the furnace below this temperature. If you have a separate “Auxiliary Heat Lockout” for electric strips, ensure that’s also adjusted if you have electric auxiliary heat. 6. Nest also has an “Alt. Heat Lockout” which is the temperature at which alternate heat (your furnace) will be used instead of the heat pump. This is your EBP. * Honeywell Home (e.g., T9, T10, Prestige IAQ): 1. On the thermostat, tap “Menu” > “Installer Options” (you may need to hold a button for a few seconds or enter a code, often 0000). 2. Navigate to “System Type” or “Equipment Setup.” 3. Look for “Heat Pump Settings” or “Auxiliary Heat Settings.” 4. Find “Compressor Lockout Temperature” or “Outdoor Temperature Lockout.” 5. Adjust this value to your heat pump’s thermal limit (TBP). For cold-climate units, target 10°F (-12°C) or 0°F (-18°C). 6. For dual-fuel systems, look for “Dual Fuel Balance Point” or “Fossil Fuel Lockout.” This is where you’ll set your Economic Balance Point (EBP). For example, if your EBP is 30°F (-1°C), set this to 30°F. This tells the thermostat to switch to the furnace below 30°F, but the heat pump can still run down to your compressor lockout temp (e.g., 10°F) if the furnace isn’t needed. Important Considerations During Adjustment: * Start Conservatively: If you’re unsure, don’t immediately drop your lockout to 0°F. Start at 20°F (-7°C), monitor performance and comfort, and then gradually lower it if your heat pump handles it well. * Monitor Comfort: Pay attention to how your home feels. If you notice your heat pump struggling to maintain temperature at lower settings, it might be an indication that your TBP is higher than you thought, or your heat pump is undersized. * Defrost Cycles: Ensure your heat pump is still performing its defrost cycles properly at lower temperatures. This is crucial for efficient operation. * Emergency Heat: Your emergency heat setting (usually pure electric resistance) should remain as a last resort, only for extreme cold or heat pump malfunction. Step 5: Monitor and Fine-Tune Your System The initial setup is just the beginning. True optimization comes from monitoring and making small adjustments. * Track Energy Usage: Use your utility’s online portal or a smart energy monitor to track your electricity and gas consumption, especially during cold spells. Look for trends. * Observe Thermostat Behavior: Pay attention to when your auxiliary heat kicks in. Does it align with your new settings? * Listen to Your System: Does your heat pump sound like it’s struggling? Is it running constantly without reaching the setpoint? These could be signs to adjust your lockout temperature slightly upwards. * Re-evaluate Fuel Costs: Energy prices fluctuate. Periodically re-evaluate your electricity and gas costs to see if your Economic Balance Point has shifted significantly. By following these steps, you’re not just changing a number on a screen; you’re taking control of your home’s heating strategy, ensuring your advanced heat pump works for you, not against your budget. You’re transforming your smart thermostat from a passive controller into an active, intelligent manager of your dual-fuel system.Fine-Tuning Your System: Monitoring and Advanced Considerations
Beyond the initial setup, continuous monitoring and understanding a few more nuances can push your savings even further. Understanding “Staging” and “Differential” Settings Many smart thermostats also allow you to configure “staging” and “temperature differential” settings. * Staging: This refers to how your thermostat calls for different levels of heat. For example, it might call for Stage 1 heat (heat pump only) first. If the temperature continues to drop or the setpoint isn’t met within a certain time, it might call for Stage 2 (heat pump + auxiliary heat, or just auxiliary heat if below the lockout). * Temperature Differential: This is the difference between your setpoint and the actual room temperature that triggers a heating call. A smaller differential means your system cycles more frequently but maintains a tighter temperature. A larger differential means fewer cycles but wider temperature swings. For heat pumps, a slightly larger differential (e.g., 1.5-2°F) can sometimes be more efficient than very tight control, as it allows for longer, more efficient runtimes. The Role of Outdoor Temperature Sensors Your smart thermostat relies on an accurate outdoor temperature reading. Most connect to weather services online, but some higher-end systems or professional installations might include a dedicated outdoor temperature sensor. Ensure this sensor is accurate and not exposed to direct sunlight or other heat sources that could skew readings. Considering Your Home’s Insulation and Air Sealing No matter how perfectly you tune your balance point, a leaky, poorly insulated home will always cost more to heat. Think of your home’s envelope as the foundation of your heating efficiency. Before obsessing over the last degree of your balance point, ensure your attic insulation is adequate, windows are sealed, and major air leaks are addressed. These improvements amplify the savings from your optimized heat pump. When to Call a Professional While many of these adjustments are homeowner-friendly, don’t hesitate to call a qualified HVAC technician if: * You’re unsure about your heat pump’s specific capabilities or minimum operating temperatures. * You’re uncomfortable navigating the advanced settings of your thermostat. * Your system isn’t performing as expected after adjustments (e.g., poor comfort, excessive auxiliary heat, strange noises). * You want a precise calculation of your thermal and economic balance points based on a detailed home heat loss analysis. A good technician can verify your settings, ensure your heat pump is operating correctly, and even perform a “load calculation” to confirm your heat pump is appropriately sized for your home. By taking these steps, you’re not just saving money; you’re becoming a more informed and empowered homeowner. You’re transforming that initial frustration into confidence, knowing that you’ve optimized your dual-fuel system to deliver comfort efficiently, no matter how cold it gets.Frequently Asked Questions
What is the difference between thermal and economic balance points for a heat pump? The thermal balance point is the outdoor temperature where your heat pump’s maximum heating capacity exactly matches your home’s heat loss, requiring supplemental heat below this point. The economic balance point, specific to dual-fuel systems, is the outdoor temperature where the cost per delivered BTU from your heat pump equals the cost per delivered BTU from your auxiliary fuel (e.g., natural gas furnace). How low can I safely set my heat pump’s compressor lockout temperature? For modern cold-climate heat pumps, you can often safely set the compressor lockout temperature down to 10°F (-12°C) or even 0°F (-18°C), depending on your specific unit’s manufacturer specifications. Always consult your heat pump’s manual for its minimum rated operating temperature to avoid damage or inefficient operation. Why is my electric bill so high with a heat pump, especially in cold weather? A high electric bill with a heat pump in cold weather is usually due to the thermostat’s factory default settings activating costly electric resistance auxiliary heat too early. These defaults often shut off the heat pump compressor around 35°F (2°C), forcing the less efficient electric strips to carry the heating load, significantly increasing electricity consumption. Do all smart thermostats allow balance point adjustments for dual-fuel systems? Most popular smart thermostats like Ecobee, Nest, and Honeywell Home offer advanced settings to adjust compressor lockout temperatures and dual-fuel balance points. The specific terminology and navigation paths vary between brands and models, but the functionality to optimize these settings is generally available within their installer or advanced configuration menus.
Dual Fuel Integration, Balance Points & Thermostat Tuning
Compressor efficiency curves dictate the precise outdoor thermal balance point where auxiliary heating should engage. Review our technical engineering guide on Cold-Climate Heat Pump COP: -15C Heating Efficiency.